Using Owl Pellets in The Classroom
As a teacher, trying to come up with fun, new, educational activities for your classroom can be difficult task. After all, most kids these days seem to get bored rather quick with anything that involves learning. However, with just a few basic supplies, you can have your class perform a hands-on owl pellet dissection where they can actually see and touch the science being taught to them.

An owl pellet contains the indigestible remains of an owls meal. Typically, it will contain hair, bones, fur, and insect shells, as these are common meals for an owl. Having your classroom perform an owl pellet dissection will allow them to break open the pellets and see what the owl has eaten, teaching them about biology and the how the food chain works. While the word “dissection” may turn some people away from wanting to participate in this activity, it’s really not bad; there’s no foul odor, mess, or blood, as most owl pellets have been sterilized and dried out.
Supplies You’ll Need For a Classroom Pellet Dissection
Before you purchase the supplies, you’ll need to count the number of students who plan on participating in the project. You’ll want to one set of supplies for each student, one for you, and maybe a couple extra just in case. Here are the supplies you’ll need to purchase in order to perform the classroom dissection:
- Owl pellets
- Paper plates
- Paper towels
- Latex gloves
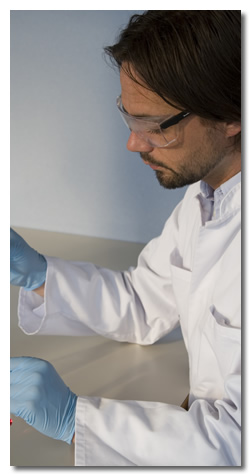
- Safety goggles
- Tweezers
- Hand sanitizer
- Bone chart (these can be found out printed out online)
- Magnifying glass (optional)
Having Your Class Perform The Dissection
When you have everything ready, pass out a dissection kit (one of each of the supplies mentioned above) to each of your students, placing the owl pellet on their paper place. During the dissection, you’ll be exploring the contents of the owl pellet and working to identify the contents of it. The goal is both to identify what the owl consumed, and to identify the bones (if any) found within the pellet.
Preparing The Class
Before the start of the class dissection, have your students put on their safety goggles and latex gloves, as this will help protect them against any possible germs and bacteria. Owl pellets are generally sold only after being sterilized and dried, but it’s always better to be safe than sorry when working with any biological material that can harbor dangerous germs.
Steps To Dissecting in The Classroom
Next, tell your students to pick up their tweezers and gently begin pulling apart the pellet. As they pull the contents out of the pellet, it’s best to go ahead and start separating it off, putting hair and fur off to one side and bones to another. The bones within owl pellets can be broken easily if not careful, so have everyone use caution during the dissection.
After completely dissecting the owl pellet, your students should then try to identify the parts inside of it. This is where the bone charts come into action. Have your students match the bone findings of the pellet to the bones on the chart. You may want this to be a group discussion where you can offer aid and instruction.
If you have time left over after the dissection, see if you can come up with a complete skeletal makeup by combining the bones of the students owl pellets. It can be quite amazing and exciting for the kids to see a complete skeleton of a rodent such as a vole after the dissection.